 Lokesh Thalla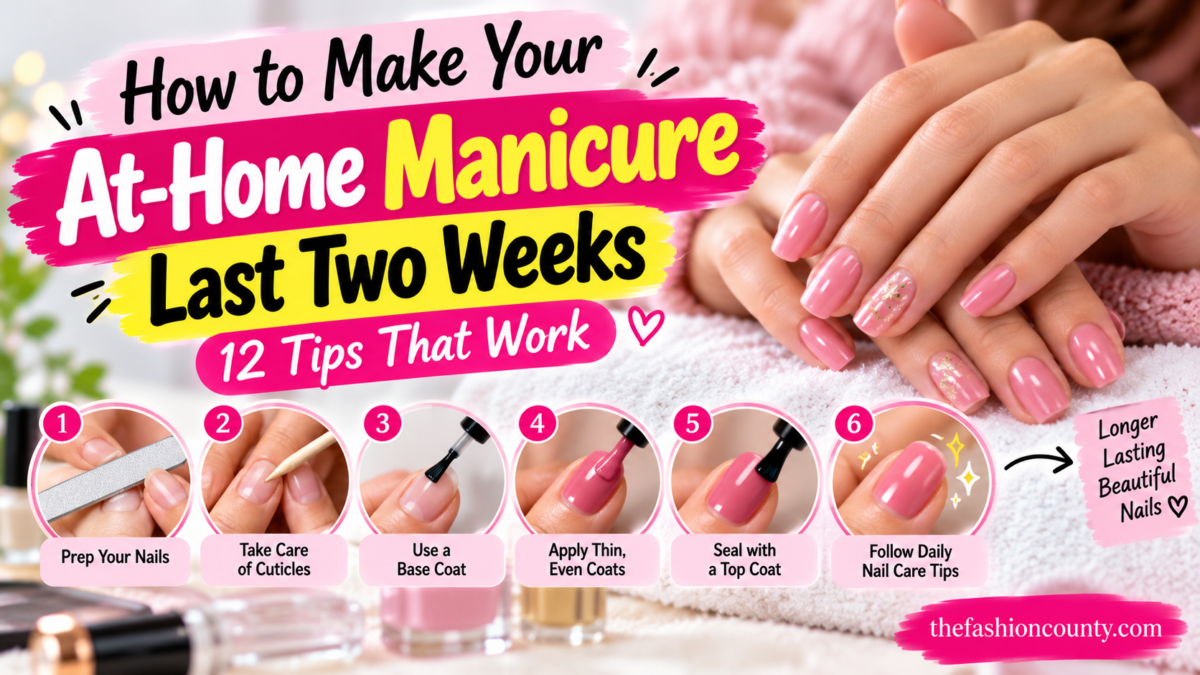
In this article
- 1. Start With Clean, Dry Nails
- 2. Shape Your Nails Before Painting
- 3. Apply a Base Coat Every Time
- 4. Apply Thin Layers of Nail Polish
- 5. Seal the Nail Tips
- 6. Never Skip the Top Coat
- 7. Give Each Layer Enough Time to Dry
- 8. Wear Gloves When Cleaning
- 9. Protect Your Nails From Excessive Water Exposure
- 10. Moisturize Your Cuticles Daily
- 11. Avoid Using Your Nails as Tools
- 12. Choose the Right Nail Polish System
- A Simple At-Home Manicure Routine
- Common Manicure Mistakes That Cause Early Chipping
- Frequently Asked Questions
- How can I make regular nail polish last two weeks?
- Why does my nail polish chip after two days?
- Should I apply a top coat every day?
- Is gel polish better than regular nail polish?
- How can I remove nail polish without damaging my nails?
- Final Thoughts
There is nothing more frustrating than spending time on a beautiful at-home manicure only to see the polish chip a few days later. The good news is that a few simple changes to your nail preparation, polish application, and daily habits can help your manicure look fresh for longer.
Whether you love classic red nails, neutral shades, French tips, or seasonal nail colors, the key to a longer-lasting manicure starts before you even open your nail polish bottle.
Can an at-home manicure last two weeks? Yes, it is possible with some nail systems, especially gel polish applied and maintained correctly. However, regular air-dry nail polish generally chips sooner, so a full two weeks is not guaranteed.
Here are 12 practical tips to help you achieve a neat, salon-inspired manicure at home.
1. Start With Clean, Dry Nails
One of the most important steps in a long-lasting manicure is preparing your nails properly.
Oil, lotion, dust, and leftover polish can interfere with how well the new polish adheres to the nail surface. Even if your nails look clean, product residue can affect the final result.
Before applying nail polish:
- Remove any old polish.
- Wash your hands if needed and dry them thoroughly.
- Gently remove visible residue from the nail surface.
- Avoid applying hand cream or cuticle oil immediately before painting.
If you use an alcohol-based nail cleanser, choose a product intended for nail preparation and follow its directions. Avoid repeatedly dehydrating the skin around your nails.
Pro tip: Preparation matters more than applying extra layers of polish.
2. Shape Your Nails Before Painting
Your manicure will look neater when all your nails have a consistent shape and smooth edges.
Use a clean nail file to shape your nails before applying the base coat. Rounded, oval, and soft-square shapes are popular choices because they can complement different nail lengths.
File gently in a controlled direction, particularly if your nails tend to split or peel. Avoid aggressive filing or thinning the natural nail plate.
If you prefer short nails, that is perfectly fine. A clean shape and well-applied polish can look just as polished as a longer manicure.
3. Apply a Base Coat Every Time
A base coat creates a suitable foundation for your nail color. It can help improve adhesion and reduce staining from strongly pigmented shades.
Apply a thin, even layer and allow it to dry or cure according to the product instructions before adding color.
Choose a base coat that is compatible with your nail polish system. A regular air-dry base coat and a gel base coat are not interchangeable.
Why it matters: Skipping the base coat may compromise the finish and shorten wear, depending on the products you use.
4. Apply Thin Layers of Nail Polish
Thick coats may look convenient because they seem to provide full coverage quickly. However, they can dry unevenly and remain soft underneath, making dents, smudges, and peeling more likely.
For a smoother manicure:
- Remove excess polish from the brush.
- Apply a thin layer down the center of the nail.
- Cover each side with controlled strokes.
- Allow the layer to dry as directed.
- Apply another thin coat if needed.
Two thin coats often provide better results than one thick coat, although the ideal number depends on the formula and color.
Pro tip: Dark and highly pigmented shades may require extra care to avoid streaks. Build the color gradually instead of applying too much polish at once.
5. Seal the Nail Tips
The free edge of your nail is exposed to repeated contact with keyboards, packaging, clothing, and other surfaces. This can contribute to premature chipping.
When applying your base coat, color, and top coat, lightly run the brush along the free edge when the product instructions allow it. This technique is often called capping the edge.
Do not apply thick layers around the tip. The goal is a thin, even seal rather than a bulky buildup of polish.
6. Never Skip the Top Coat
A top coat adds shine and provides an extra layer over your nail color. Depending on the formula, it can also improve resistance to everyday wear.
For a longer-lasting manicure:
- Apply an even coat over the color.
- Cover the free edge where appropriate.
- Follow the product’s drying or curing instructions.
- Avoid using a top coat that is incompatible with your nail polish.
Some regular nail polishes benefit from a compatible top coat reapplied according to its instructions. This can help refresh the finish, although it cannot completely reverse existing chips or peeling.
7. Give Each Layer Enough Time to Dry
A manicure can appear dry on the surface while remaining soft underneath. Touching objects too soon can leave fingerprints, dents, or smudges.
Allow sufficient drying time between layers and after the final coat. Follow the manufacturer’s instructions, as drying time varies by formula, coat thickness, and environmental conditions.
If you are often in a hurry, consider quick-dry nail polish or a compatible quick-dry top coat.
Remember that regular nail polish air-dries, while gel polish requires the specified curing lamp and system. Gel polish should never be treated as if it dries in the same way as regular polish.
8. Wear Gloves When Cleaning
Household cleaning products, prolonged water exposure, and repeated wet work can be tough on your nails and manicure.
Wearing protective gloves while washing dishes, cleaning the bathroom, or handling cleaning products can help reduce exposure.
Choose gloves that fit comfortably and remove them when practical to prevent prolonged moisture buildup inside.
Everyday habit: Keep a pair of cleaning gloves near the sink so you do not have to search for them when you need them.
9. Protect Your Nails From Excessive Water Exposure
Water is part of everyday life, but frequent or prolonged soaking can contribute to nail swelling and weakening. Repeated wetting and drying may also encourage some types of polish to lift or chip.
You do not need to avoid washing your hands. Instead, try to limit unnecessary soaking, wear gloves for prolonged wet work, and dry your hands properly.
Avoid taking long baths immediately after a fresh manicure if your polish is still setting.
10. Moisturize Your Cuticles Daily
Healthy-looking cuticles make a manicure appear neater, even when the polish is not brand new.
Apply a small amount of cuticle oil or a suitable moisturizer to the skin around your nails. Regular moisturizing helps reduce dryness and roughness.
However, avoid getting oily products on the nail plate immediately before applying fresh polish because residue can interfere with adhesion.
Do not cut living cuticle tissue aggressively. If you have painful, swollen, or damaged skin around a nail, allow it to heal and seek professional advice if necessary.
11. Avoid Using Your Nails as Tools
Opening cans, scraping labels, peeling stickers, and prying open packages can put unnecessary pressure on your nails.
These habits may cause chips, cracks, and lifting, even when the manicure has been applied correctly.
Instead, use an appropriate tool, such as a spoon, scissors, or package opener, whenever possible.
This small change can make a noticeable difference to both your manicure and the condition of your natural nails.
12. Choose the Right Nail Polish System
Not all manicures are designed to last the same amount of time.
| Manicure type | What to expect |
|---|---|
| Regular nail polish | Easy to remove, but may chip within days |
| Long-wear regular polish | May offer improved wear with compatible base and top coats |
| Gel polish | Can offer longer wear when properly applied and cured |
| Press-on nails | Wear varies with nail preparation, adhesive, and application |
| Traditional salon acrylics | Different system with separate maintenance and removal requirements |
If your main goal is a manicure that lasts close to two weeks, gel polish may be an option. However, it requires careful application, the correct curing equipment, and safe removal.
Uncured gel products can cause allergic reactions if they contact the skin. Avoid skin contact, follow the product and lamp instructions, and never peel or forcibly remove gel polish. If you notice itching, redness, swelling, or nail separation, stop using the product and seek appropriate medical advice.
A Simple At-Home Manicure Routine
You can use this routine as a starting point for a regular nail polish manicure.
Step 1: Prepare. Remove old polish, shape your nails, and ensure the nail surfaces are clean and dry.
Step 2: Apply the base coat. Use a thin layer and allow it to dry according to the label.
Step 3: Add your color. Apply one thin coat, let it dry, and apply a second coat if necessary.
Step 4: Finish with a top coat. Apply an even layer and lightly seal the tips where appropriate.
Step 5: Let it set. Give your manicure enough time to dry before returning to activities that could dent the polish.
Step 6: Maintain it. Moisturize your cuticles, protect your hands during cleaning, and avoid picking at any lifting polish.
Common Manicure Mistakes That Cause Early Chipping
Avoid these common mistakes if you want your nail polish to look neat for longer.
- Applying polish over oily or damp nails.
- Using thick coats that dry unevenly.
- Skipping the base coat or top coat when the system calls for them.
- Touching objects before the polish has dried sufficiently.
- Exposing your hands to repeated wet work without protection.
- Picking or peeling chipped polish.
- Using incompatible products from different nail systems.
- Trying to make regular nail polish last like gel polish without considering the difference in formulation.
Frequently Asked Questions
How can I make regular nail polish last two weeks?
Prepare your nails carefully, use thin coats, apply compatible base and top coats, protect your hands during cleaning, and avoid picking at chips. Even with good care, regular polish may not last two weeks without visible wear.
Why does my nail polish chip after two days?
Possible reasons include insufficient nail preparation, oily nail surfaces, thick polish layers, inadequate drying time, frequent water exposure, and repeated impacts on the nail tips.
Should I apply a top coat every day?
Not necessarily. Follow the instructions for your top coat. Some formulas can be reapplied periodically to refresh shine, but excessive layering may create buildup or affect the finish.
Is gel polish better than regular nail polish?
Gel polish can last longer, but it requires correct curing and careful removal. Regular nail polish is generally easier to remove at home. The better choice depends on your priorities and how your nails respond to each system.
How can I remove nail polish without damaging my nails?
Use a remover suitable for your polish type, follow its instructions, and avoid scraping or peeling the product off. After removal, moisturize your nails and surrounding skin.
Final Thoughts
A long-lasting at-home manicure is not just about finding the perfect nail color. It depends on proper preparation, thin and even application, sufficient drying or curing time, and a few protective daily habits.
Start with clean nails, use compatible products, and protect your hands during household chores. With a little practice, you can achieve a smoother, shinier manicure that stays attractive for longer without frequent trips to the salon.